miko@tunto.cn
solar powered led yard lighting made cheap & easy
by:Tunto
2020-05-01
In this Instructure, I will share some of the outdoor solar LED lighting projects that I am currently launching and running.
I will talk about how I can combine these projects together, why select certain projects instead of others, what is needed to purchase projects, how to calculate the panels and batteries you need, in order to have a reasonable and reliable setting.
I try to tend to \"do what I can do again\"
Cheap \"mentality.
You can buy outdoor solar lighting devices that are turnkey and ready to use, but I find I can build my own solar lighting with less money and from a practical point of view
These are all projects completed by amateurs with technical background.
Different cities have different building codes.
Code in some places is more stringent than in others.
This is low voltage (12v)stuff.
It is the responsibility of the reader/builder to comply with any local building code that may apply.
What do you need to replicate what I do?
The basics of hand tools, power tools, electricity, wires, and of course the elusive common sense.
You need solar panels, batteries, charging controllers and cables to connect everything from the equipment.
I have been using 12-for years-
14ga outdoor lighting cables, such as those used in Malibu lighting equipment.
This material has a solar-resistant thermal insulation and can be used outdoors for many years.
What can be expected from these systems?
A fairly reliable solar lighting system that can illuminate a part of your yard without relying on the commercial grid.
What are the limitations of solar lighting systems?
To put it simply, there is no sun = no power.
If you don\'t get into the oversized panel and battery settings, you just need to accept that on cloudy days your system may not run for hours as expected.
In this structure, we are all trying to make it simple enough to work reliably on sunny days.
Zoom things in so your system can spend a bad day or two in the sun, which will be introduced later in Instructure.
Since it is free, no noise will be made.
I \'ve been using solar energy for amateur radio applications for over 20 years, but Hurricane Irma\'s recent visit has given me a push to convert some outdoor lighting into lighting dependency without a grid.
Unfortunately, we live in a world where some people think that a power outage is an opportunity to get a power outage that is not theirs.
After a large blackout, places with lights often convey the message that someone is at home, and illegal intrusion may not be a good idea.
Continued drone lighting without a generator is also good.
Will you save money?
To this extent, this is very questionable, but if you are somewhere and are known for power outages every time the wind blows, then the peace of mind is well worth it.
In addition to being out of the grid, solar energy is a great way to get lighting where electricians are powered off.
What I have done here can easily be applied to a remote hunter cottage or other business force that is not the place of choice.
If you buy everything new and are a frugal shopper, you can assemble a reliable system for less than $100.
You can save a little cash if you are a good Amoy.
Batteries and solar panels are the most expensive components.
I will cover the sourcing of different parts in the next few pages.
The battery is your gas tank \".
It stores the energy you generate during the day.
For a simple setting of Dusk to Dawn (
Open at night, rest during the day)
, 10 AH for every 10 w LED lighting is at least correct.
If you can afford more battery capacity, buy it!
10 w of LED lighting?
Yes, for example, the modern 10 w LED floodlight can easily illuminate the driveway.
The 10 w LED bulb in the lamp can illuminate the room.
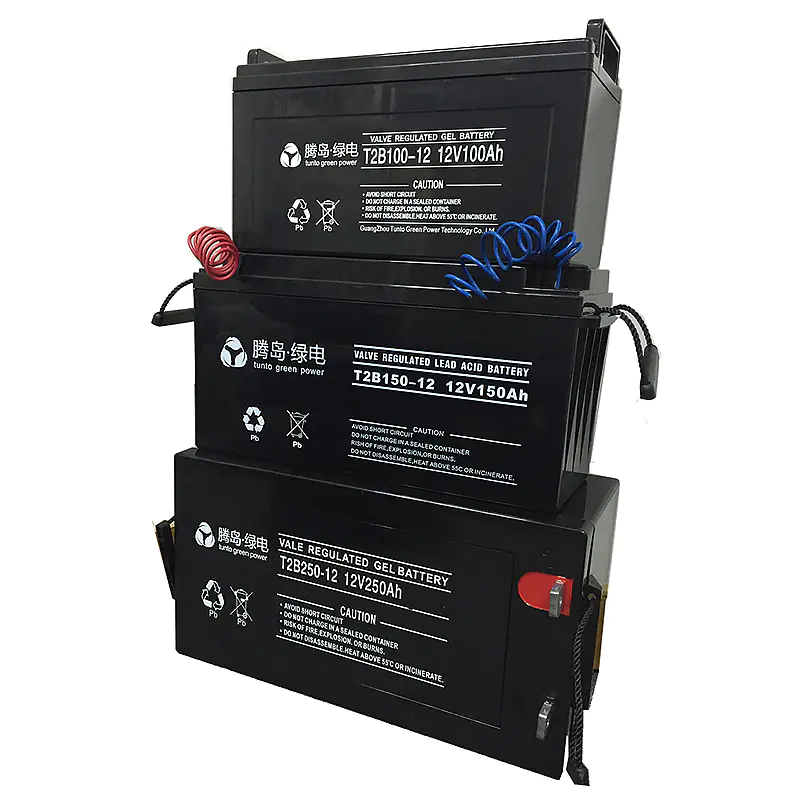
The type of battery I use is called SLA sealed lead acid (pics 1-3).
This battery is usually present in the UPS system of computers, adult motorcycles and children taking toys such as electric wheels.
6 v and 12 v are common.
Their rated voltage and number of amps.
For example, an SLA battery can be marked as 12 V 10. 5Ah (pic 1).
This means that it is a 12 v battery that can hold 10. 5Ah of current.
If you pull an amplifier from this battery and it is fully charged and in good condition, you should be able to run on the battery for 10 hours.
The higher the Ah rating, the greater the capacity of the battery.
These types of batteries are usually rectangular or small cubes.
They can be mounted upright or on the side, but I prefer to run upright in case the seals do not meet the standard. sourcing them. .
These can be bought from all the common online vendors such as ebay, Amazon, Wal-Mart, etc.
The hardware store and the special battery store will also be carried out.
I found the best deal for these new items on the Wal-Mart website.
If you spend a certain amount of money, they usually have a deal for free shipping.
I purchased 20Ah 12 v SLA from Walmart.
Com ships for $25, but these transactions are not common.
This price is hard to beat if they have a problem (
I received a damaged one)
Any Wal-Mart store can be returned.
Used batteries are cheap/free but cheap.
If you know someone who deals with UPS (
Uninterrupted power supply)
In a business-scale system, you can often get used batteries without nearly anything.
Even if dead, all lead-acid batteries have scrap value due to the amount of lead.
There are places where you don\'t want to deal with them and may let you take them away.
I bought some old batteries like this and got some good ones from the pile.
Go Bad to scrap metal and finally get some extra pocket money.
A quick way to remove the bad SLA Battery in the old battery pack is to view and shake.
Cases that are broken or bloated are not good.
The battery sounds like there\'s something loose when it\'s shaking, usually dry out, no good.
If the terminal enters the battery box, the corrosion around it is not good.
As I mentioned earlier, these are not good for our project but still have scrap value.
Once you have removed the obviously bad battery, measure the voltage of the remaining battery with a multimeter.
12 v battery display is less than 10.
5 v may have been done and is not worth fiddling.
Pass any readings below 5 v on a 6 v battery.
Once the battery is discharged in depth and left in this way, they are damaged.
Take down the rest of your \"probably good\" pile and charge them with a slow charger.
Small batteries below 20Ah should be charged around 2Ah.
All the small car battery chargers I \'ve seen have a set up that is comparable to this.
And you risk cooking batteries.
You need a 6 v charger if you have a 6 v battery.
Charge the old battery while slowly charging at night.
Remove it from the charger and let it sit for about an hour to stabilize.
Measure the voltage, write it on the battery with a permanent mark, let the battery disconnect overnight, then recharge
Measure the voltage the next day.
If it drops below 12 v, it\'s bad and there\'s some kind of shortage inside.
It is likely to be available if the voltage is above 12 v.
On the 6 v battery, the test is the same, but after a day of sitting, the test passed any battery below 6 v.
There are actual battery capacity testers for this purpose, but we keep it cheap and simple here.
How much battery capacity do you need?
In order to run the number of lights, plus their wattage, multiplied by the number of hours they will turn on, and finally divided by 12, which is our system voltage.
This will give us the number of amps we consume for a day\'s operation.
Everyone who enters solar energy always asks a battery question. . .
Can I use the car battery?
Yes, you can, but there are some drawbacks to the car battery.
Their aim is to quickly extract a large amount from the start motor and then charge it immediately.
They don\'t work well for long discharge applications.
Car and truck batteries are also called wet batteries.
They are filled with liquid acid, so it is necessary to always remain upright and discharge smoke when charging.
SLA is more suitable for closed electronic boxes and indoor applications.
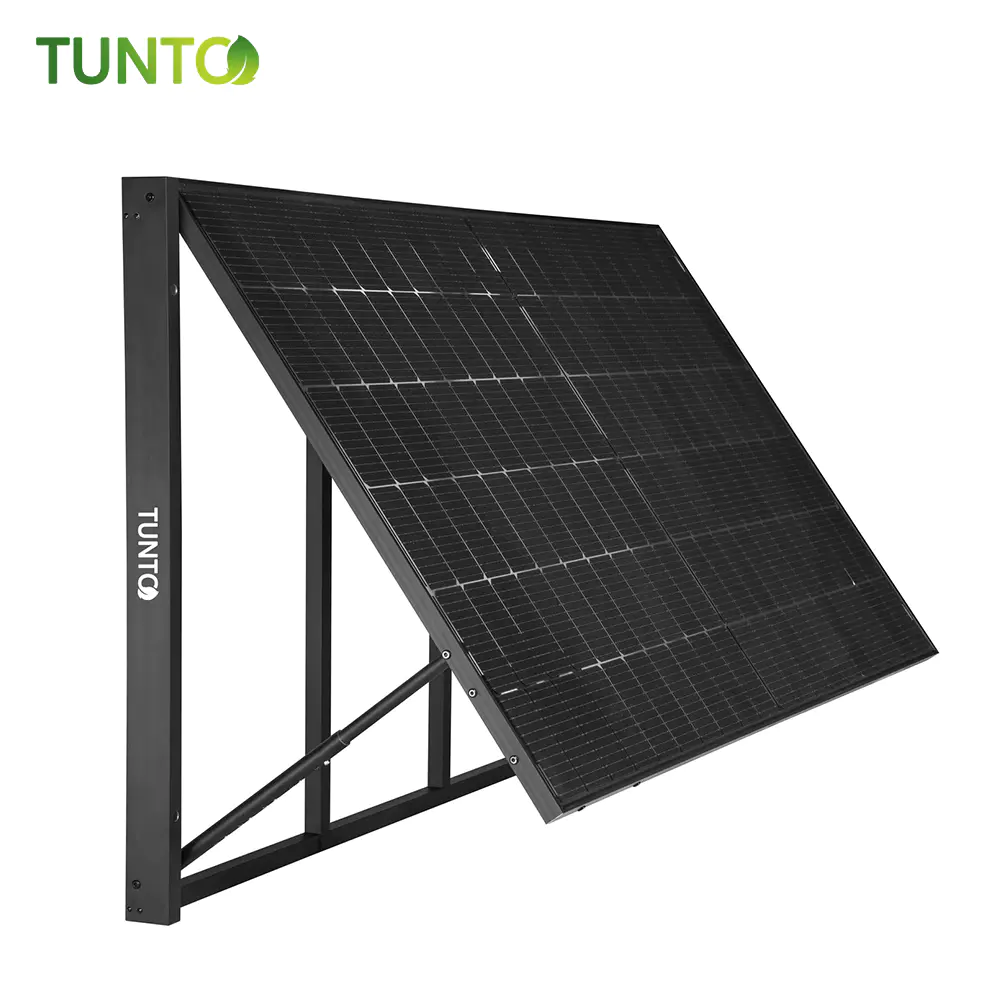
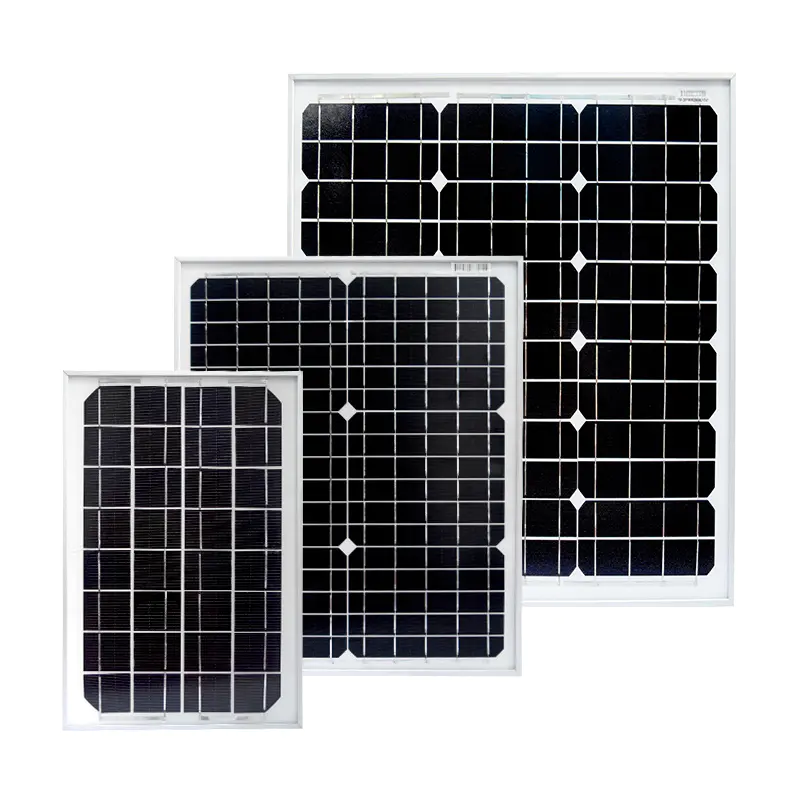
Solar panels come in a variety of shapes, sizes, grades, and prices.
You can spend a lot of money if you are an educated shopper, but don\'t need it.
Do we remember being frugal?
Amorphous and silicon
Amorphous solar panels (pic 1)
It\'s something common in small solar court lights and trinkets.
The panel is brown.
This is the most inefficient low-cost technology (
More panels are needed to generate the same power compared to silicon)
Shorter life span.
There are some discount tool suppliers selling solar kits made of amorphous boards.
One of the benefits they have is that they perform better in the \"shadows\" app, such as cloudy days.
Pass these out unless you get them for free or almost free.
The only benefit is no more than all the disadvantages. Silicon panel (pic 2)
Have a blue look for them and that\'s what you want.
Silicon solar cells can be made from single or multi-crystals.
This leads to dark blue or even blue, or blue that looks like a thin sheet.
Both methods can meet our needs.
There is a difference between a single crystal plate and a polycrystal plate, but for our purposes both are fine.
Single crystal panels tend to generate more power per square inch, but this is the smallest difference in the size of our work.
So what we\'re looking for is the silicon battery panel, what else do you need to look for physically?
Solar panels can be framed or frameless.
They can be rigid or flexible.
They can have a glass face or epoxy sealing surface.
The glass panel is made of aluminum frame and has the longest service life.
As long as it is not physically abused, it is not uncommon to last for 20 years.
Non-frame panels need frames to protect them and give you a way to install them.
The epoxy panel works well over a few years, but over time the epoxy sealant fades slowly and reduces the yield of the panel.
Finally, the epoxy became so dark that the panels were useless.
Flexible panels are convenient for portable installation, but due to the bending of electrical contacts and the epoxy resin sealer they are used to keep the entire assembly flexible, the service life is short.
The way to go is glass finish aluminum frame silicon.
There are many different output variations for solar panels.
In order to keep it simple, keep the open voltage with various groups during the month-20v range.
These will be considered 12 v system panels and will match well with the ultra-cheap regulators we will discuss later.
Can you use a panel with a higher voltage?
Yes, but it needs a more expensive maximum power tracking regulator.
Can you use the panel with lower Open voltage?
It is not that there are no electronic ideas that are not worth the effort at all.
The exception is if you have multiples of the same panels and you connect them in series to increase their operating voltage.
There is also an additional electrical spec to worry about, but we will come back to this issue. New or used?
With the continuous progress of solar panel technology, the new is obviously better.
The $4 per watt panel 20 years ago is now $1 per watt or less.
Solar panels live outdoors, cook in the sun, rain, freeze on cold nights depending on where you live.
In a word, their life is very difficult.
It\'s not uncommon for the 100 w glass panel on the 12 v system on Ebay to sell for $100.
For setting up two 10 w LED lights in sunny places, 60 w is about ideal.
If you can afford a new panel then go this way. Going used?
There are a few things to look.
Skip the epoxy panels unless they are almost free.
Epoxy has limited service life before starting to darken and reduce the production of solar panels.
If the epoxy sealant becomes honey color obviously, it is on the outside.
These epoxy panels can be identified simply by going Your nails deep into the surface of the panel.
There will be some epoxy panels, not glass.
Amorphous panels are not worth using unless close to free.
Like epoxy panels, they have a limited life span.
Production will decrease as we grow older.
The expected service life of the amorphous panel is about 7-10 years.
With the decline in the price of silicon, the limit of the decline in production and the shortened life makes the amorphous panel hardly worth the treatment.
This left us a glass panel.
These are clearly the best options for any solar project.
A carefully crafted glass finish aluminum frame Silicon panel can easily last for 20 years.
When buying these uses, skip anything that has glass damage.
They may still produce it, but it won\'t last long.
The curved aluminum frame can usually be fixed by removing the frame and straightening the guide rail.
Another defect to look for on the silicon panel is humidity damage.
If the seal of the solar panel assembly is broken, you can get the humidity inside it.
This will look like white smoke above the solar cell (pic 3).
Although it is not a direct killer, it will shorten the life of the panel and will definitely reduce the output.
How about the electrical test of the old panel?
If the panel you are looking at is less than 400 watts per unit, you can do all the tests with a normal multimeter.
Your meter should be able to handle currents up to 10a (most do).
Place the panel in direct sunlight for testing.
Set the multimeter to DC voltage and measure the output.
If the panel is in direct sunlight, the voltage reading should be very close to the open circuit voltage on the manufacturer\'s label on the lower side of the panel (pic 4).
Next we will test the current output.
Set the meter to amps (
Some need to move leads)
Just like you do a voltage test.
When a test meter is checking the amplifier, it will make it short no matter what you test.
This is a big taboo.
Most electronic devices are not available, but it is OK to test the solar panel as your meter can handle the output of the panel.
The AMP reading you get should be close to the maximum amp rating on the panel label.
If you get zero, check the fuse inside your meter before condemning the panel.
It is not uncommon for people to accidentally blow the fuse and forget to replace it.
It\'s not hard to figure out how much solar panel capacity you need, but you do need to know some data on how much power load you\'re going to run and how well the sun is in your body.
The rated power of the solar panel is usually Watt.
This number is obtained by multiplying the working voltage of the panel by its current.
This information is found on the label on the back of the panel.
This Instructure is designed to help people build a cheap lighting solution while keeping it simple.
So far we have been using 12 v 10 w LED bulbs as the load.
This gives us a simple number of light bulbs that are cheap and easy to find online.
A long way to calculate. . .
In the system from dusk to dawn, we are looking for about 10-
Most places are 12 hours a day.
This means that our solar energy panels have to generate enough power to run the lights at night and overcome any loss caused by charging.
The efficiency of no system is 100%. (1)
10 w bulbs run 12 hours per night = 120 w power consumption. (2)
10 w bulbs run 12 hours per night = 240 w power consumption, so if we want to run (2)
10 w LED floodlights 12 hours a day at night, we need to generate 240 w power from our system.
But this number is in a perfect world.
The efficiency of the battery-free charging system is 100%.
On top of that, you may have a cloudy day, or a bird that decides to camp on your panel.
In sunny places, a good rule of thumb is that in a perfect world, your system is 80% efficient.
So our math tells us that we need 240 w power (2)10w LED lights.
Our system is up to 80% efficient, so we need to take out 300 watts a day to keep the battery up enough to run our lights that night.
This is close, though.
The bad weather of the day, you have a big impact on the battery power of the day.
I prefer to have a larger safety blanket, at least twice the amount I need to produce. So for (2)
10 w LED lights run for 12 hours and I would like to produce at least 480 w per day.
It looks like a big number, but it\'s really not what you\'ll see.
No matter where you go to the world, you can check the average number of sun sunshine in an area.
This is the average number of sunshine hours in an area.
Where I am, the magic number is 7. 5.
So knowing this number, I can easily figure out what my panel will produce every day in clear weather.
30 w panel Times 7.
5 = 225 w sunny production.
This is close enough to my goal of 240 w (
Safety margin 120 w x 2)
For a 10 w LED light, it can run reliably for 12 hours a day.
Why do I only count the number of solar isolation?
This gave me a little safety margin at the beginning and end of the solar panel still producing something, but did not reach the peak output.
Solar capacity required from dusk to dawn system = wattage of lamp multiplied by running time and then doubled.
To calculate the output of the panel on the same day, find out the solar sunshine number and multiply it by the rated wattage of the panel.
There are many variables here.
Does your group actually produce what they claim?
If your system is more inefficient than typical? etc.
So you can be in the baseball field.
Now, based on my experience in sunny South Florida, this is an easy way. . .
The 30 w of the panel and 10Ah battery will run the 10 w LED floodlight all night, but you don\'t have the safety margin.
The 20 w of the panel and 10Ah battery will run 9 w LED lights all night, but you don\'t have the safety margin.
In order to buy some profits for yourself in the case of cloudy days, the panel size and battery size are twice the original size.
What happens if you don\'t generate enough power and don\'t have some safety margin in your settings?
Very simple, the light does not go out until the next day when the battery is charged.
Of course, if you live in a place that is not as sunny as South Florida, then my experience makes no sense to you and you have to go back to the sunshine data to calculate.
A sentence about the reliability of the system. . .
To reduce costs and scale, I have kept things on a very reliable scale on sunny days and have some tolerance for some cloudy days.
As I said before, there is no sun = no power.
If you absolutely need a device that can handle a completely cloudy day without leaving you in the dark, I suggest you multiply your battery and solar capacity by the cloudy days you wish to spend before the system has a chance to charge.
Also don\'t forget to upgrade your regulator.
A. 10A charging controller (regulator)
Only 120 w of the panel can be processed in the 12 v system.
In addition to the solar panels themselves, the next biggest drop in solar prices is the cost of regulators.
The regulator or charging controller is a device that takes power from the panel and keeps it in a safe range to charge the battery.
Some charging controllers can also provide you with low voltage disconnection (LVD)
And be able to turn on the lights automatically at dusk and turn off the lights automatically at dawn.
In the near past, a 15 amp charging controller will make it easy for you to return $50 or more.
These are high quality products made in the United States.
Like most other electronics, the Chinese have figured out how to make them cheap and keep all the features.
These cheap regulators are PWM technology and it\'s not the most efficient right now, but it\'s very cheap and more efficient than the splitter regulator.
Avoid old diverters because they can cause serious damage to electronic devices.
The way they work is to connect the panel directly to the battery and observe the voltage.
Once the predetermined value is reached, they turn off and wait for the battery voltage to drop again.
This swing of up and down voltage can destroy some electronic devices.
There is also a charging controller technology called maximum power point tracking, which is the most effective and has some benefits over the PWM type, but they do cost more money and therefore are not in this manualIn pics 1, & 3-5)
You can see some different options from China.
These prices range from 10a to 20 a and all are less than $10.
They all have the light control power of LVD and dusk to dawn.
The deal is a cheaper build but I haven\'t had any failures yet and I am very happy with them. What is LVD?
Low voltage disconnection is a circuit in the charging controller to detect when the battery is running very low and disconnect the load (
What is being powered)
From the battery
This is important because running out of lead-acid batteries can greatly shorten the life of the battery.
This is the fault insurance to prevent battery damage.
After the battery is charged, the LVD resets and everything works again.
What are the features of dusk to dawn?
This feature uses solar panels as light sensors.
If the panels do not see the light, they do not generate electricity.
If electricity is not generated, it means it is dark and we should turn on the lights.
That\'s how it works.
For example, in the case of the use of a lighting system in a cottage or shed, you will want to control the light through a switch.
The Twilight to Dawn function can be bypassed by the button programming on each charging controller that I have seen with some sort of LCD display.
Some very basic charging controllers retain the LVD, but cancel the function from dusk to dawn.
Resist the urge to bypass the LVD by connecting the lamp directly to the battery.
If your battery is dead, it will ruin it.
My experience with the latest batch of charging controllers in China (regulators)
You connect the battery first, then the panel, then the load.
Some of these controllers can run on a 24 v system and connect the battery first, which tells it that you are using a 12 v or 24 v system.
Rated current of the charging controller (pic 2)
They can handle it.
A little overkill is not a big deal, but a 10A unit is enough for basic lighting like the one we built here.
As we discussed here, Unit 20 A is more needed than the basic system. USB charging -added bonus!
It seems that the latest trend in China\'s charging controllers is to provide USB charging ports for mobile phones and so on.
This toll port may be a welcome addition for people who build use facilities in the cabin or workshop.
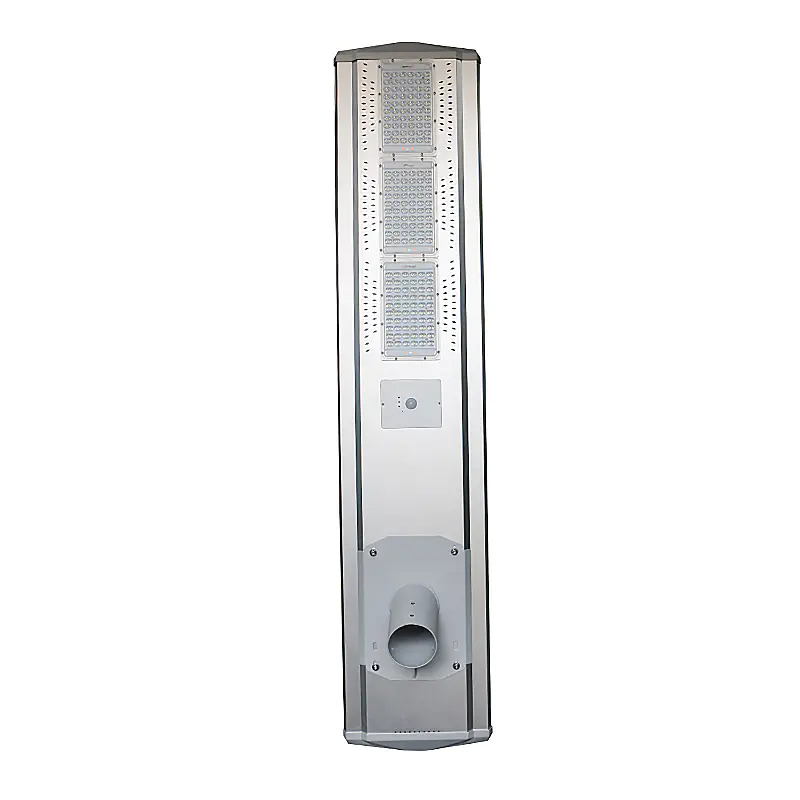
When it comes to solar lighting projects, there is a way to go, that is, LED!
LED technology is really one of the best things about off-grid power.
It is efficient, sturdy and cheap, and has a lot of options from sterile bright white to bulbs that can change color through a remote control.
If it\'s not an LED bulb, none of my settings are worth doing.
In Figure 1 you can see the latest floodlight I have set up for the backyard.
The two lights are enough to illuminate a considerable part of the yard, but only consume 20 w of power.
In photos 2 and 3, you can see what they look like when the fixtures are not powered on.
These special fixtures are 10 w warm white LED floodlights for outdoor use. Cost?
At the time of writing, 10 of them shipped through ebay sellers in China for an incredible $39 price.
Since all the voltages are low, they become a breeze with 12 v wiring.
In figure 4, you\'ll see another great option to transform a traditional 110 v fixture.
These are 12 v LED bulbs based on Edison.
They twist into a normal fixture so you can re-
Beautiful yard fixtures for 110 v bulbs.
Figure 9 w warm White LED e27 base bulb.
It\'s $1.
Through the Chinese suppliers on ebay, 50 are shipped at the time of writing.
The downside of these products is that they have regular sockets installed, so you need to make sure that they are not accidentally put into regular 110 v lights.
If they do, you will smoke a cigarette for $1. 50 expense. In pics 3-
You can see a few photos of the e27 base bulb and fixture in a normal fixture.
I really like these bulbs for yard lighting as they produce light that is useful enough but not annoying.
Since they can be fitted with any standard fixtures, you can take some nice fixtures from the clean platform of the local home improvement store like me and without any mods
The same wiring for 110 v can be used for 12 v as the current consumption is very small in our application.
One thing to consider about these cheap bulbs, though, is that they are usually not suitable for the weather.
No matter where you put them, you must protect the bulbs from the environment.
The exception is the outdoor rated flood light you see in photo 23.
As I mentioned earlier, these LED bulbs can be purchased in multiple colors.
My preference for white light is warm White (
Aprox 3000 k on color temperature scale)
It matches the light of traditional incandescent lamps very well.
Comfortable and warm white comes at the expense of a slight reduction in light output.
Cold white bulb (6000-7000k)
More lumens can be obtained by producing sterile bright white light (light output)
Every tile, but some people find anything other than mission lighting annoying.
I am a member of these people and have commissioned all my cold white bulbs to places like workshops or laundry.
Keep in mind that LED bulbs are more effective than their previous incandescent bulbs.
10 w LED floodlights can easily illuminate the lanes of 2 cars.
The 9 w bulb I used in outdoor fixtures did a great job lighting the yard with no noticeable brightness.
The LED is polarity sensitive.
If your lights don\'t work, wrap the wires around the lights.
I haven\'t seen any bulbs that are damaged by connecting back, but most DC LED bulbs don\'t turn on if the polarity is incorrect.
The rare exception is some 12 v AC/DC bulbs that don\'t care about polarity.
Your charging controller and battery need to be protected from the environment when your solar panel needs to be outdoors.
The goal here is to keep it away from the weather and from living things.
The charging controller warms up during normal operation, which can attract bugs and reptiles.
While the SLA Battery is sealed, the low-cost charging controller is not usually available.
If the feces of insects or reptiles enter, they destroy electronic devices.
The plastic outdoor electrical box is easy to use and the price is quite cheap. In pics 1-
You can see some of my options for the attachment.
In Figure 1, I use the $10 plastic electrical junction box at Home Depot to hold the regulator.
In any case, the sealed battery is placed on the stand of the sheet metal shelf.
The battery is glued to the shelf holder using VHB tape, which is an upscale double sided tape for automotive applications.
The whole unit is under the roof outside. In pics 2-
You see a setup I made that lights up the two fixtures hanging between the two trees in the yard.
This box is an outdoor rated plastic communication box, just like the one cable companies use in their customers\' homes.
The plastic outdoor box is cheap and easy to use, but remember that it is plastic.
The sun will win and the box will fail.
If you are going this route, please check your fence frequently and make sure it keeps up with the weather.
For the best results of outdoor protection, outdoor rated metal boxes can be obtained, but these metal boxes may be expensive.
Remember, the goal here is to keep it cheap and useful.
You can choose more professional installation options, but these are useful to me.
In the first photo you saw my solar backyard light.
Floodlights are 10 w warm white LED like I thought before.
Use the RTV silicone adhesive to stick the panel to the roof of the plastic shed.
The charging controller and battery are installed in the shed.
The system survived the hurricane Irma, and Figure 2 is a photo taken by Irma.
The cottage looks like a giant sitting on it, and someone throws a grenade at it after the storm, but the solar lighting has been working.
In fact, I have long wood screws installed on all the mating panels, which makes it not blown to crush.
I regrouped all the plastic plates on the shed and reorganized everything that was blown away inside.
The solar unit is non-destructive.
The panel of the RTV did not fall off.
The trick is to clean the surface to be bonded with transgender alcohol.
Those panels are tight.
In Figure 3, you\'ll see that I \'ve recently been seeking a complement to fully converting all of my yard lighting to solar energy.
What you see is the 55 w panel supported on the Lowes $10 shelf stand.
The lights used were the same as the 10 w LED flood I used on the shed.
The charging controller is installed in a weatherproof box, located under a wooden roof between the raf and the battery.
Pictures 4 and 5 need more explanation.
Hurricane Irma hit two of my mango trees.
They were successfully raised and raised by cribbing.
These wooden brackets will be there for a while, so I decided to install another 55 watt panel and an outdoor box for regulators and batteries on it.
This setting will eventually be moved to a more aesthetically pleasing position, but because of knowing it works fine.
It powers two 9 w LED bulbs suspended on stainless steel cables.
In figure 5, you can see the settings I designed to make the panel easy to disassemble.
There are two stainless steel eyelets on the board supporting the panel, just like the eyelets used on the top of the boat bimini.
The hole eye is aligned with the hole on the panel frame.
Place the pin on the top and bottom, keep the panel in place.
In case of a tropical storm or worse, I can pull two pins and quickly release the panel for safe storage.
When writing, these four systems run in my home.
They all use glass panels, some of which are 20 years old.
Pic 1 is a 110 v glass and metal lantern that I re-use as a 12 v focus light.
It hangs on a shelf that looks beautiful.
Inside is a 9 w LED warm white bulb.
The setting includes a 20 w panel, a used 12Ah SLA Battery, and a Chinese 10A charging controller.
It has been reliably running from disk to Dawn since installation.
In Figure 2, we have two 110 V glass and metal lanterns reused as yard lights around my fire pit area.
Yes, I have a \"fun\" backyard just like most other self-esteem hotfixes, so please forgive this mess!
The lantern is equipped with a 9 w warm white LED light bulb and is hung on a stainless steel cable on both sides.
Maintain tension on the cable by re-adjusting the purpose of the screen door spring and chain assembly (pic 3).
The system charges from the old 55 w panel through the Morningstar charging controller and runs from 10. 5Ah SLA Battery.
The system has proved reliable from dusk to dawn.
In Figure 4 is the latest system I set up.
It is (2)
10 w LED warm white floodlight, old 55 w panel, 10A regulator in China and 20Ah battery.
The system works great in lighting up the backyard, but when both floodlights are turned on, I can\'t get back the full cost the next day.
The panel itself was damaged due to moisture intrusion and not draining all of the power.
I might replace that panel, but now it works perfectly for a single floodlight.
I do have a switch installed that allows me to choose either a single light or a double light.
Pic 5 was mentioned earlier.
I needed lighting in the far back yard and decided to let the solar spin.
This is the inspiration to move forward with other projects.
The settings include 10 w warm white LED flood light, 10A China regulator, 20Ah SLA Battery, 10 w panel on one side and 20 w panel on the other.
The device has proved reliable from dusk to dawn.
Although this is a tree that needs to be trimmed, it does not shade the panel.
The shadow panel does not generate peak power.
I hope these buildings will inspire you to try solar energy.
With some basic calculations and frugal shopping, it is reliable and cheap.
I will talk about how I can combine these projects together, why select certain projects instead of others, what is needed to purchase projects, how to calculate the panels and batteries you need, in order to have a reasonable and reliable setting.
I try to tend to \"do what I can do again\"
Cheap \"mentality.
You can buy outdoor solar lighting devices that are turnkey and ready to use, but I find I can build my own solar lighting with less money and from a practical point of view
These are all projects completed by amateurs with technical background.
Different cities have different building codes.
Code in some places is more stringent than in others.
This is low voltage (12v)stuff.
It is the responsibility of the reader/builder to comply with any local building code that may apply.
What do you need to replicate what I do?
The basics of hand tools, power tools, electricity, wires, and of course the elusive common sense.
You need solar panels, batteries, charging controllers and cables to connect everything from the equipment.
I have been using 12-for years-
14ga outdoor lighting cables, such as those used in Malibu lighting equipment.
This material has a solar-resistant thermal insulation and can be used outdoors for many years.
What can be expected from these systems?
A fairly reliable solar lighting system that can illuminate a part of your yard without relying on the commercial grid.
What are the limitations of solar lighting systems?
To put it simply, there is no sun = no power.
If you don\'t get into the oversized panel and battery settings, you just need to accept that on cloudy days your system may not run for hours as expected.
In this structure, we are all trying to make it simple enough to work reliably on sunny days.
Zoom things in so your system can spend a bad day or two in the sun, which will be introduced later in Instructure.
Since it is free, no noise will be made.
I \'ve been using solar energy for amateur radio applications for over 20 years, but Hurricane Irma\'s recent visit has given me a push to convert some outdoor lighting into lighting dependency without a grid.
Unfortunately, we live in a world where some people think that a power outage is an opportunity to get a power outage that is not theirs.
After a large blackout, places with lights often convey the message that someone is at home, and illegal intrusion may not be a good idea.
Continued drone lighting without a generator is also good.
Will you save money?
To this extent, this is very questionable, but if you are somewhere and are known for power outages every time the wind blows, then the peace of mind is well worth it.
In addition to being out of the grid, solar energy is a great way to get lighting where electricians are powered off.
What I have done here can easily be applied to a remote hunter cottage or other business force that is not the place of choice.
If you buy everything new and are a frugal shopper, you can assemble a reliable system for less than $100.
You can save a little cash if you are a good Amoy.
Batteries and solar panels are the most expensive components.
I will cover the sourcing of different parts in the next few pages.
The battery is your gas tank \".
It stores the energy you generate during the day.
For a simple setting of Dusk to Dawn (
Open at night, rest during the day)
, 10 AH for every 10 w LED lighting is at least correct.
If you can afford more battery capacity, buy it!
10 w of LED lighting?
Yes, for example, the modern 10 w LED floodlight can easily illuminate the driveway.
The 10 w LED bulb in the lamp can illuminate the room.
The type of battery I use is called SLA sealed lead acid (pics 1-3).
This battery is usually present in the UPS system of computers, adult motorcycles and children taking toys such as electric wheels.
6 v and 12 v are common.
Their rated voltage and number of amps.
For example, an SLA battery can be marked as 12 V 10. 5Ah (pic 1).
This means that it is a 12 v battery that can hold 10. 5Ah of current.
If you pull an amplifier from this battery and it is fully charged and in good condition, you should be able to run on the battery for 10 hours.
The higher the Ah rating, the greater the capacity of the battery.
These types of batteries are usually rectangular or small cubes.
They can be mounted upright or on the side, but I prefer to run upright in case the seals do not meet the standard. sourcing them. .
These can be bought from all the common online vendors such as ebay, Amazon, Wal-Mart, etc.
The hardware store and the special battery store will also be carried out.
I found the best deal for these new items on the Wal-Mart website.
If you spend a certain amount of money, they usually have a deal for free shipping.
I purchased 20Ah 12 v SLA from Walmart.
Com ships for $25, but these transactions are not common.
This price is hard to beat if they have a problem (
I received a damaged one)
Any Wal-Mart store can be returned.
Used batteries are cheap/free but cheap.
If you know someone who deals with UPS (
Uninterrupted power supply)
In a business-scale system, you can often get used batteries without nearly anything.
Even if dead, all lead-acid batteries have scrap value due to the amount of lead.
There are places where you don\'t want to deal with them and may let you take them away.
I bought some old batteries like this and got some good ones from the pile.
Go Bad to scrap metal and finally get some extra pocket money.
A quick way to remove the bad SLA Battery in the old battery pack is to view and shake.
Cases that are broken or bloated are not good.
The battery sounds like there\'s something loose when it\'s shaking, usually dry out, no good.
If the terminal enters the battery box, the corrosion around it is not good.
As I mentioned earlier, these are not good for our project but still have scrap value.
Once you have removed the obviously bad battery, measure the voltage of the remaining battery with a multimeter.
12 v battery display is less than 10.
5 v may have been done and is not worth fiddling.
Pass any readings below 5 v on a 6 v battery.
Once the battery is discharged in depth and left in this way, they are damaged.
Take down the rest of your \"probably good\" pile and charge them with a slow charger.
Small batteries below 20Ah should be charged around 2Ah.
All the small car battery chargers I \'ve seen have a set up that is comparable to this.
And you risk cooking batteries.
You need a 6 v charger if you have a 6 v battery.
Charge the old battery while slowly charging at night.
Remove it from the charger and let it sit for about an hour to stabilize.
Measure the voltage, write it on the battery with a permanent mark, let the battery disconnect overnight, then recharge
Measure the voltage the next day.
If it drops below 12 v, it\'s bad and there\'s some kind of shortage inside.
It is likely to be available if the voltage is above 12 v.
On the 6 v battery, the test is the same, but after a day of sitting, the test passed any battery below 6 v.
There are actual battery capacity testers for this purpose, but we keep it cheap and simple here.
How much battery capacity do you need?
In order to run the number of lights, plus their wattage, multiplied by the number of hours they will turn on, and finally divided by 12, which is our system voltage.
This will give us the number of amps we consume for a day\'s operation.
Everyone who enters solar energy always asks a battery question. . .
Can I use the car battery?
Yes, you can, but there are some drawbacks to the car battery.
Their aim is to quickly extract a large amount from the start motor and then charge it immediately.
They don\'t work well for long discharge applications.
Car and truck batteries are also called wet batteries.
They are filled with liquid acid, so it is necessary to always remain upright and discharge smoke when charging.
SLA is more suitable for closed electronic boxes and indoor applications.
Solar panels come in a variety of shapes, sizes, grades, and prices.
You can spend a lot of money if you are an educated shopper, but don\'t need it.
Do we remember being frugal?
Amorphous and silicon
Amorphous solar panels (pic 1)
It\'s something common in small solar court lights and trinkets.
The panel is brown.
This is the most inefficient low-cost technology (
More panels are needed to generate the same power compared to silicon)
Shorter life span.
There are some discount tool suppliers selling solar kits made of amorphous boards.
One of the benefits they have is that they perform better in the \"shadows\" app, such as cloudy days.
Pass these out unless you get them for free or almost free.
The only benefit is no more than all the disadvantages. Silicon panel (pic 2)
Have a blue look for them and that\'s what you want.
Silicon solar cells can be made from single or multi-crystals.
This leads to dark blue or even blue, or blue that looks like a thin sheet.
Both methods can meet our needs.
There is a difference between a single crystal plate and a polycrystal plate, but for our purposes both are fine.
Single crystal panels tend to generate more power per square inch, but this is the smallest difference in the size of our work.
So what we\'re looking for is the silicon battery panel, what else do you need to look for physically?
Solar panels can be framed or frameless.
They can be rigid or flexible.
They can have a glass face or epoxy sealing surface.
The glass panel is made of aluminum frame and has the longest service life.
As long as it is not physically abused, it is not uncommon to last for 20 years.
Non-frame panels need frames to protect them and give you a way to install them.
The epoxy panel works well over a few years, but over time the epoxy sealant fades slowly and reduces the yield of the panel.
Finally, the epoxy became so dark that the panels were useless.
Flexible panels are convenient for portable installation, but due to the bending of electrical contacts and the epoxy resin sealer they are used to keep the entire assembly flexible, the service life is short.
The way to go is glass finish aluminum frame silicon.
There are many different output variations for solar panels.
In order to keep it simple, keep the open voltage with various groups during the month-20v range.
These will be considered 12 v system panels and will match well with the ultra-cheap regulators we will discuss later.
Can you use a panel with a higher voltage?
Yes, but it needs a more expensive maximum power tracking regulator.
Can you use the panel with lower Open voltage?
It is not that there are no electronic ideas that are not worth the effort at all.
The exception is if you have multiples of the same panels and you connect them in series to increase their operating voltage.
There is also an additional electrical spec to worry about, but we will come back to this issue. New or used?
With the continuous progress of solar panel technology, the new is obviously better.
The $4 per watt panel 20 years ago is now $1 per watt or less.
Solar panels live outdoors, cook in the sun, rain, freeze on cold nights depending on where you live.
In a word, their life is very difficult.
It\'s not uncommon for the 100 w glass panel on the 12 v system on Ebay to sell for $100.
For setting up two 10 w LED lights in sunny places, 60 w is about ideal.
If you can afford a new panel then go this way. Going used?
There are a few things to look.
Skip the epoxy panels unless they are almost free.
Epoxy has limited service life before starting to darken and reduce the production of solar panels.
If the epoxy sealant becomes honey color obviously, it is on the outside.
These epoxy panels can be identified simply by going Your nails deep into the surface of the panel.
There will be some epoxy panels, not glass.
Amorphous panels are not worth using unless close to free.
Like epoxy panels, they have a limited life span.
Production will decrease as we grow older.
The expected service life of the amorphous panel is about 7-10 years.
With the decline in the price of silicon, the limit of the decline in production and the shortened life makes the amorphous panel hardly worth the treatment.
This left us a glass panel.
These are clearly the best options for any solar project.
A carefully crafted glass finish aluminum frame Silicon panel can easily last for 20 years.
When buying these uses, skip anything that has glass damage.
They may still produce it, but it won\'t last long.
The curved aluminum frame can usually be fixed by removing the frame and straightening the guide rail.
Another defect to look for on the silicon panel is humidity damage.
If the seal of the solar panel assembly is broken, you can get the humidity inside it.
This will look like white smoke above the solar cell (pic 3).
Although it is not a direct killer, it will shorten the life of the panel and will definitely reduce the output.
How about the electrical test of the old panel?
If the panel you are looking at is less than 400 watts per unit, you can do all the tests with a normal multimeter.
Your meter should be able to handle currents up to 10a (most do).
Place the panel in direct sunlight for testing.
Set the multimeter to DC voltage and measure the output.
If the panel is in direct sunlight, the voltage reading should be very close to the open circuit voltage on the manufacturer\'s label on the lower side of the panel (pic 4).
Next we will test the current output.
Set the meter to amps (
Some need to move leads)
Just like you do a voltage test.
When a test meter is checking the amplifier, it will make it short no matter what you test.
This is a big taboo.
Most electronic devices are not available, but it is OK to test the solar panel as your meter can handle the output of the panel.
The AMP reading you get should be close to the maximum amp rating on the panel label.
If you get zero, check the fuse inside your meter before condemning the panel.
It is not uncommon for people to accidentally blow the fuse and forget to replace it.
It\'s not hard to figure out how much solar panel capacity you need, but you do need to know some data on how much power load you\'re going to run and how well the sun is in your body.
The rated power of the solar panel is usually Watt.
This number is obtained by multiplying the working voltage of the panel by its current.
This information is found on the label on the back of the panel.
This Instructure is designed to help people build a cheap lighting solution while keeping it simple.
So far we have been using 12 v 10 w LED bulbs as the load.
This gives us a simple number of light bulbs that are cheap and easy to find online.
A long way to calculate. . .
In the system from dusk to dawn, we are looking for about 10-
Most places are 12 hours a day.
This means that our solar energy panels have to generate enough power to run the lights at night and overcome any loss caused by charging.
The efficiency of no system is 100%. (1)
10 w bulbs run 12 hours per night = 120 w power consumption. (2)
10 w bulbs run 12 hours per night = 240 w power consumption, so if we want to run (2)
10 w LED floodlights 12 hours a day at night, we need to generate 240 w power from our system.
But this number is in a perfect world.
The efficiency of the battery-free charging system is 100%.
On top of that, you may have a cloudy day, or a bird that decides to camp on your panel.
In sunny places, a good rule of thumb is that in a perfect world, your system is 80% efficient.
So our math tells us that we need 240 w power (2)10w LED lights.
Our system is up to 80% efficient, so we need to take out 300 watts a day to keep the battery up enough to run our lights that night.
This is close, though.
The bad weather of the day, you have a big impact on the battery power of the day.
I prefer to have a larger safety blanket, at least twice the amount I need to produce. So for (2)
10 w LED lights run for 12 hours and I would like to produce at least 480 w per day.
It looks like a big number, but it\'s really not what you\'ll see.
No matter where you go to the world, you can check the average number of sun sunshine in an area.
This is the average number of sunshine hours in an area.
Where I am, the magic number is 7. 5.
So knowing this number, I can easily figure out what my panel will produce every day in clear weather.
30 w panel Times 7.
5 = 225 w sunny production.
This is close enough to my goal of 240 w (
Safety margin 120 w x 2)
For a 10 w LED light, it can run reliably for 12 hours a day.
Why do I only count the number of solar isolation?
This gave me a little safety margin at the beginning and end of the solar panel still producing something, but did not reach the peak output.
Solar capacity required from dusk to dawn system = wattage of lamp multiplied by running time and then doubled.
To calculate the output of the panel on the same day, find out the solar sunshine number and multiply it by the rated wattage of the panel.
There are many variables here.
Does your group actually produce what they claim?
If your system is more inefficient than typical? etc.
So you can be in the baseball field.
Now, based on my experience in sunny South Florida, this is an easy way. . .
The 30 w of the panel and 10Ah battery will run the 10 w LED floodlight all night, but you don\'t have the safety margin.
The 20 w of the panel and 10Ah battery will run 9 w LED lights all night, but you don\'t have the safety margin.
In order to buy some profits for yourself in the case of cloudy days, the panel size and battery size are twice the original size.
What happens if you don\'t generate enough power and don\'t have some safety margin in your settings?
Very simple, the light does not go out until the next day when the battery is charged.
Of course, if you live in a place that is not as sunny as South Florida, then my experience makes no sense to you and you have to go back to the sunshine data to calculate.
A sentence about the reliability of the system. . .
To reduce costs and scale, I have kept things on a very reliable scale on sunny days and have some tolerance for some cloudy days.
As I said before, there is no sun = no power.
If you absolutely need a device that can handle a completely cloudy day without leaving you in the dark, I suggest you multiply your battery and solar capacity by the cloudy days you wish to spend before the system has a chance to charge.
Also don\'t forget to upgrade your regulator.
A. 10A charging controller (regulator)
Only 120 w of the panel can be processed in the 12 v system.
In addition to the solar panels themselves, the next biggest drop in solar prices is the cost of regulators.
The regulator or charging controller is a device that takes power from the panel and keeps it in a safe range to charge the battery.
Some charging controllers can also provide you with low voltage disconnection (LVD)
And be able to turn on the lights automatically at dusk and turn off the lights automatically at dawn.
In the near past, a 15 amp charging controller will make it easy for you to return $50 or more.
These are high quality products made in the United States.
Like most other electronics, the Chinese have figured out how to make them cheap and keep all the features.
These cheap regulators are PWM technology and it\'s not the most efficient right now, but it\'s very cheap and more efficient than the splitter regulator.
Avoid old diverters because they can cause serious damage to electronic devices.
The way they work is to connect the panel directly to the battery and observe the voltage.
Once the predetermined value is reached, they turn off and wait for the battery voltage to drop again.
This swing of up and down voltage can destroy some electronic devices.
There is also a charging controller technology called maximum power point tracking, which is the most effective and has some benefits over the PWM type, but they do cost more money and therefore are not in this manualIn pics 1, & 3-5)
You can see some different options from China.
These prices range from 10a to 20 a and all are less than $10.
They all have the light control power of LVD and dusk to dawn.
The deal is a cheaper build but I haven\'t had any failures yet and I am very happy with them. What is LVD?
Low voltage disconnection is a circuit in the charging controller to detect when the battery is running very low and disconnect the load (
What is being powered)
From the battery
This is important because running out of lead-acid batteries can greatly shorten the life of the battery.
This is the fault insurance to prevent battery damage.
After the battery is charged, the LVD resets and everything works again.
What are the features of dusk to dawn?
This feature uses solar panels as light sensors.
If the panels do not see the light, they do not generate electricity.
If electricity is not generated, it means it is dark and we should turn on the lights.
That\'s how it works.
For example, in the case of the use of a lighting system in a cottage or shed, you will want to control the light through a switch.
The Twilight to Dawn function can be bypassed by the button programming on each charging controller that I have seen with some sort of LCD display.
Some very basic charging controllers retain the LVD, but cancel the function from dusk to dawn.
Resist the urge to bypass the LVD by connecting the lamp directly to the battery.
If your battery is dead, it will ruin it.
My experience with the latest batch of charging controllers in China (regulators)
You connect the battery first, then the panel, then the load.
Some of these controllers can run on a 24 v system and connect the battery first, which tells it that you are using a 12 v or 24 v system.
Rated current of the charging controller (pic 2)
They can handle it.
A little overkill is not a big deal, but a 10A unit is enough for basic lighting like the one we built here.
As we discussed here, Unit 20 A is more needed than the basic system. USB charging -added bonus!
It seems that the latest trend in China\'s charging controllers is to provide USB charging ports for mobile phones and so on.
This toll port may be a welcome addition for people who build use facilities in the cabin or workshop.
When it comes to solar lighting projects, there is a way to go, that is, LED!
LED technology is really one of the best things about off-grid power.
It is efficient, sturdy and cheap, and has a lot of options from sterile bright white to bulbs that can change color through a remote control.
If it\'s not an LED bulb, none of my settings are worth doing.
In Figure 1 you can see the latest floodlight I have set up for the backyard.
The two lights are enough to illuminate a considerable part of the yard, but only consume 20 w of power.
In photos 2 and 3, you can see what they look like when the fixtures are not powered on.
These special fixtures are 10 w warm white LED floodlights for outdoor use. Cost?
At the time of writing, 10 of them shipped through ebay sellers in China for an incredible $39 price.
Since all the voltages are low, they become a breeze with 12 v wiring.
In figure 4, you\'ll see another great option to transform a traditional 110 v fixture.
These are 12 v LED bulbs based on Edison.
They twist into a normal fixture so you can re-
Beautiful yard fixtures for 110 v bulbs.
Figure 9 w warm White LED e27 base bulb.
It\'s $1.
Through the Chinese suppliers on ebay, 50 are shipped at the time of writing.
The downside of these products is that they have regular sockets installed, so you need to make sure that they are not accidentally put into regular 110 v lights.
If they do, you will smoke a cigarette for $1. 50 expense. In pics 3-
You can see a few photos of the e27 base bulb and fixture in a normal fixture.
I really like these bulbs for yard lighting as they produce light that is useful enough but not annoying.
Since they can be fitted with any standard fixtures, you can take some nice fixtures from the clean platform of the local home improvement store like me and without any mods
The same wiring for 110 v can be used for 12 v as the current consumption is very small in our application.
One thing to consider about these cheap bulbs, though, is that they are usually not suitable for the weather.
No matter where you put them, you must protect the bulbs from the environment.
The exception is the outdoor rated flood light you see in photo 23.
As I mentioned earlier, these LED bulbs can be purchased in multiple colors.
My preference for white light is warm White (
Aprox 3000 k on color temperature scale)
It matches the light of traditional incandescent lamps very well.
Comfortable and warm white comes at the expense of a slight reduction in light output.
Cold white bulb (6000-7000k)
More lumens can be obtained by producing sterile bright white light (light output)
Every tile, but some people find anything other than mission lighting annoying.
I am a member of these people and have commissioned all my cold white bulbs to places like workshops or laundry.
Keep in mind that LED bulbs are more effective than their previous incandescent bulbs.
10 w LED floodlights can easily illuminate the lanes of 2 cars.
The 9 w bulb I used in outdoor fixtures did a great job lighting the yard with no noticeable brightness.
The LED is polarity sensitive.
If your lights don\'t work, wrap the wires around the lights.
I haven\'t seen any bulbs that are damaged by connecting back, but most DC LED bulbs don\'t turn on if the polarity is incorrect.
The rare exception is some 12 v AC/DC bulbs that don\'t care about polarity.
Your charging controller and battery need to be protected from the environment when your solar panel needs to be outdoors.
The goal here is to keep it away from the weather and from living things.
The charging controller warms up during normal operation, which can attract bugs and reptiles.
While the SLA Battery is sealed, the low-cost charging controller is not usually available.
If the feces of insects or reptiles enter, they destroy electronic devices.
The plastic outdoor electrical box is easy to use and the price is quite cheap. In pics 1-
You can see some of my options for the attachment.
In Figure 1, I use the $10 plastic electrical junction box at Home Depot to hold the regulator.
In any case, the sealed battery is placed on the stand of the sheet metal shelf.
The battery is glued to the shelf holder using VHB tape, which is an upscale double sided tape for automotive applications.
The whole unit is under the roof outside. In pics 2-
You see a setup I made that lights up the two fixtures hanging between the two trees in the yard.
This box is an outdoor rated plastic communication box, just like the one cable companies use in their customers\' homes.
The plastic outdoor box is cheap and easy to use, but remember that it is plastic.
The sun will win and the box will fail.
If you are going this route, please check your fence frequently and make sure it keeps up with the weather.
For the best results of outdoor protection, outdoor rated metal boxes can be obtained, but these metal boxes may be expensive.
Remember, the goal here is to keep it cheap and useful.
You can choose more professional installation options, but these are useful to me.
In the first photo you saw my solar backyard light.
Floodlights are 10 w warm white LED like I thought before.
Use the RTV silicone adhesive to stick the panel to the roof of the plastic shed.
The charging controller and battery are installed in the shed.
The system survived the hurricane Irma, and Figure 2 is a photo taken by Irma.
The cottage looks like a giant sitting on it, and someone throws a grenade at it after the storm, but the solar lighting has been working.
In fact, I have long wood screws installed on all the mating panels, which makes it not blown to crush.
I regrouped all the plastic plates on the shed and reorganized everything that was blown away inside.
The solar unit is non-destructive.
The panel of the RTV did not fall off.
The trick is to clean the surface to be bonded with transgender alcohol.
Those panels are tight.
In Figure 3, you\'ll see that I \'ve recently been seeking a complement to fully converting all of my yard lighting to solar energy.
What you see is the 55 w panel supported on the Lowes $10 shelf stand.
The lights used were the same as the 10 w LED flood I used on the shed.
The charging controller is installed in a weatherproof box, located under a wooden roof between the raf and the battery.
Pictures 4 and 5 need more explanation.
Hurricane Irma hit two of my mango trees.
They were successfully raised and raised by cribbing.
These wooden brackets will be there for a while, so I decided to install another 55 watt panel and an outdoor box for regulators and batteries on it.
This setting will eventually be moved to a more aesthetically pleasing position, but because of knowing it works fine.
It powers two 9 w LED bulbs suspended on stainless steel cables.
In figure 5, you can see the settings I designed to make the panel easy to disassemble.
There are two stainless steel eyelets on the board supporting the panel, just like the eyelets used on the top of the boat bimini.
The hole eye is aligned with the hole on the panel frame.
Place the pin on the top and bottom, keep the panel in place.
In case of a tropical storm or worse, I can pull two pins and quickly release the panel for safe storage.
When writing, these four systems run in my home.
They all use glass panels, some of which are 20 years old.
Pic 1 is a 110 v glass and metal lantern that I re-use as a 12 v focus light.
It hangs on a shelf that looks beautiful.
Inside is a 9 w LED warm white bulb.
The setting includes a 20 w panel, a used 12Ah SLA Battery, and a Chinese 10A charging controller.
It has been reliably running from disk to Dawn since installation.
In Figure 2, we have two 110 V glass and metal lanterns reused as yard lights around my fire pit area.
Yes, I have a \"fun\" backyard just like most other self-esteem hotfixes, so please forgive this mess!
The lantern is equipped with a 9 w warm white LED light bulb and is hung on a stainless steel cable on both sides.
Maintain tension on the cable by re-adjusting the purpose of the screen door spring and chain assembly (pic 3).
The system charges from the old 55 w panel through the Morningstar charging controller and runs from 10. 5Ah SLA Battery.
The system has proved reliable from dusk to dawn.
In Figure 4 is the latest system I set up.
It is (2)
10 w LED warm white floodlight, old 55 w panel, 10A regulator in China and 20Ah battery.
The system works great in lighting up the backyard, but when both floodlights are turned on, I can\'t get back the full cost the next day.
The panel itself was damaged due to moisture intrusion and not draining all of the power.
I might replace that panel, but now it works perfectly for a single floodlight.
I do have a switch installed that allows me to choose either a single light or a double light.
Pic 5 was mentioned earlier.
I needed lighting in the far back yard and decided to let the solar spin.
This is the inspiration to move forward with other projects.
The settings include 10 w warm white LED flood light, 10A China regulator, 20Ah SLA Battery, 10 w panel on one side and 20 w panel on the other.
The device has proved reliable from dusk to dawn.
Although this is a tree that needs to be trimmed, it does not shade the panel.
The shadow panel does not generate peak power.
I hope these buildings will inspire you to try solar energy.
With some basic calculations and frugal shopping, it is reliable and cheap.
Custom message